반응형
스프링 설정들을 마쳤으면 이제 홈 화면을 띄워보자.
먼저 따라 생성을 한 후에 동작원리를 알아보도록 하자.
● 홈 화면 생성하기
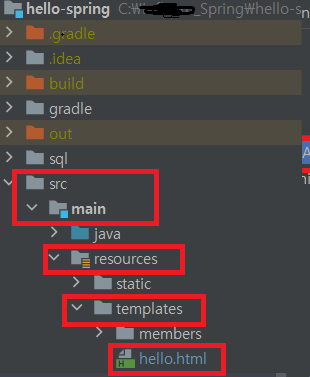
1. src > main > resources > templates > hello.html 작성
2. hello.html 코드 작성
<!DOCTYPE HTML>
<html xmlns:th="http://www.thymeleaf.org">
<head>
<title>Hello</title>
<meta http-equiv="Content-Type" content="text/html; charset=UTF-8" />
</head>
<body>
hello
</body>
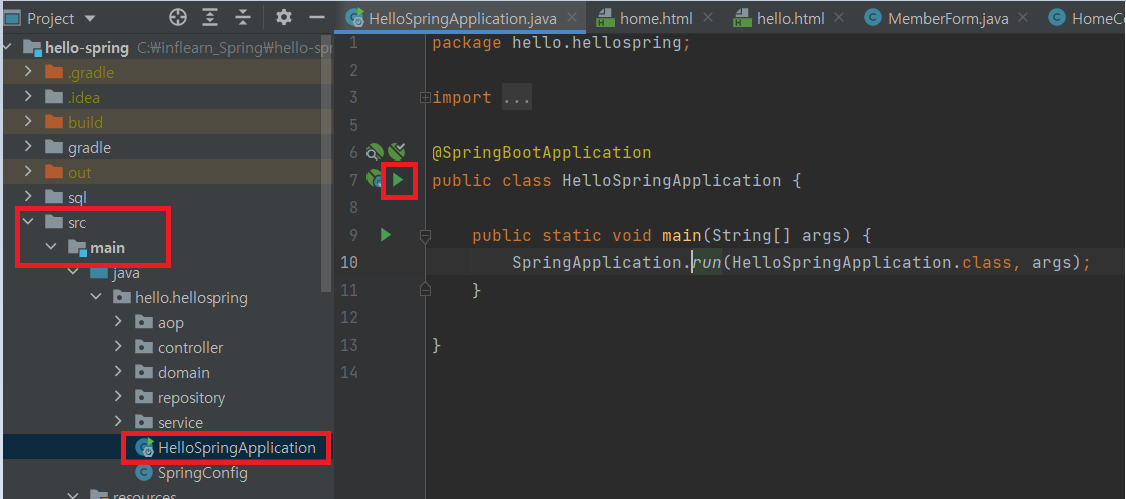
</html>3. src > main > java > hello.hellosporing(본인이 생성한 프로젝트)
> HelloSpringApplication 클래스 이름 옆 플레이 버튼 누르기
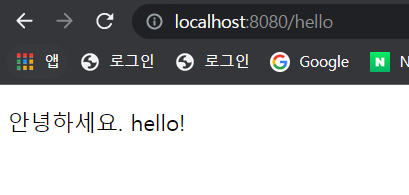
4. 브라우저에 localhost:8080/hello 입력 후 엔터
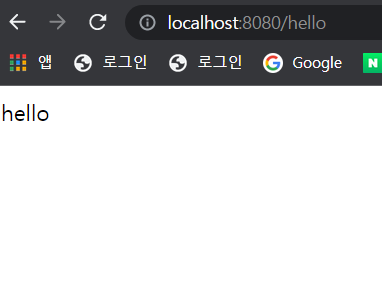
정상적으로 html 파일이 작동한 것을 볼 수 있다.
▶ 동작 원리 (정적 페이지)
기본적으로 프로젝트 application을 실행하고, 사용자가 요청을 보내면(ex. /hello)
스프링 부트의 내장 톰캣 서버를 거쳐
templates 디렉토리에 hello.html을 찾는다.
만약 있다면 hello.html 파일 안에 내용을 그대로 화면에 띄워주는 것이다.
● Thymeleaf 템플릿 엔진 적용
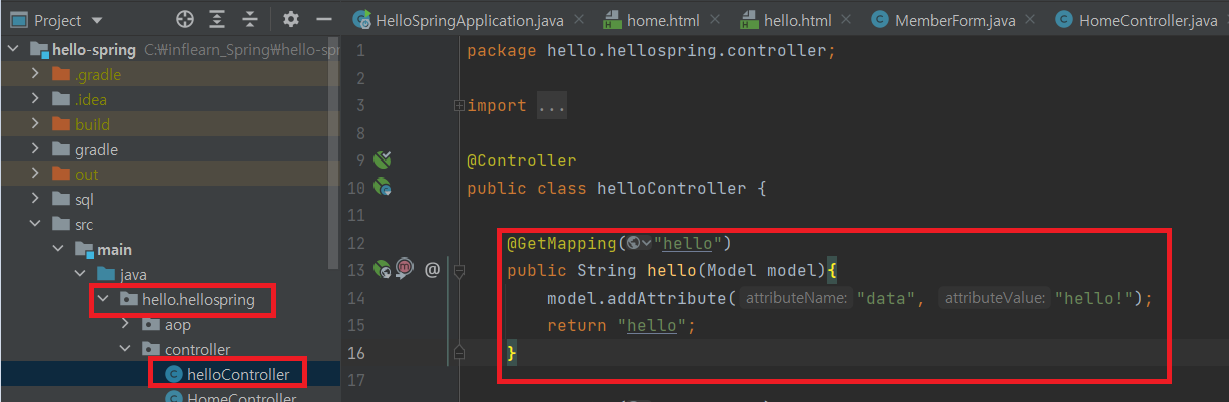
1. src > main > java > hello.hellospring(본인의 프로젝트) 에 controller 폴더를 생성
폴더 안에 helloController java 파일 작성 후
우측 화면에 나와있는대로 작성
2. hello.html 파일 수정
<!DOCTYPE HTML>
<html xmlns:th="http://www.thymeleaf.org">
<head>
  <title>Hello</title>
  <meta http-equiv="Content-Type" content="text/html; charset=UTF-8" />
</head>
<body>
<p th:text="'안녕하세요. ' + ${data}" >안녕하세요. 손님</p>
</body>
</html>
3. application을 다시 플레이하면
▶ 동작 원리 (동적 페이지)
기본적으로 프로젝트 application을 실행하고, 사용자가 요청을 보내면(ex. /hello)
스프링 부트의 내장 톰캣 서버를 거쳐
스프링 컨테이너에서 요청한 것(/hello)과 mapping 되는 클래스를 찾는다.
클래스 안에는 setattribute를 통해, data라는 이름에 hello를 넣어주었다.
이제 스프링 컨테이너 안에 있는 viewResolver가
thymeleaf 템플릿 엔진을 처리한 후(model 값과 매치되는 값 변환)
사용자에게 hello.html을 응답해준다.
반응형
'Java > Spring' 카테고리의 다른 글
| [Spring boot] 스프링 웹 개발 기초 - 정적 컨텐츠(html) (0) | 2022.01.04 |
|---|---|
| [Spring boot] 스프링 프로젝트 빌드하고 실행하기(Windows, Mac) (0) | 2022.01.03 |
| [Spring] Windows에서 preference & Run 설정: Gradle로 실행될 때(Intellij 실행속도 느림 해결) (0) | 2021.12.31 |
| [Spring] 스프링 프로젝트 생성하기 | Spring boot (0) | 2021.12.31 |
| [Spring] Springboot application 생성, 실행하기 (IntelliJ, 스프링부트 프로젝트 생성,실행하기) (0) | 2021.06.14 |